
Do you want to truly unlock your phone’s potential? Are you ready to move beyond the limitations of your stock recovery and delve into the world of custom ROMs, kernels, and advanced modifications? This comprehensive guide will walk you through the process of installing TWRP recovery, a powerful tool that opens up a world of customization options for your Android device. Learning to install TWRP is the first step towards taking full control of your phone’s software and experiencing the true power it possesses. Whether you’re looking to root your phone, create backups, or flash custom ROMs, TWRP recovery is essential.
This guide provides a detailed, step-by-step approach to installing TWRP recovery, ensuring even novice users can confidently navigate the process. We’ll cover the necessary prerequisites, explain the various methods for installation, and highlight important considerations specific to different devices. By the end of this guide, you’ll have the knowledge and confidence to successfully install TWRP and begin exploring the exciting possibilities of custom Android development. Unlock your phone’s true potential and embark on a journey of customization with our comprehensive TWRP installation guide.
What is TWRP Recovery, and Why Would You Need It?
TWRP, short for Team Win Recovery Project, is a custom recovery environment for Android devices. Think of it as a powerful toolbox that gives you far more control over your phone’s software than the stock recovery. While the standard recovery typically only allows for factory resets and applying official updates, TWRP opens a world of possibilities.
So, why would you need TWRP? Its primary function is to install custom software. This includes custom ROMs (alternative operating systems), kernels (the core of the OS), and other modifications like themes or system add-ons. TWRP also enables creating and restoring backups of your entire system, a crucial safety net before making any significant changes.
Other key features include the ability to wipe specific partitions (like the cache or dalvik cache) for troubleshooting purposes, file management directly on your device, and even sideloading updates or fixes if your phone becomes unresponsive. TWRP empowers you to take full control of your Android experience, extending its functionality and allowing deep-level customization.
Essential Precautions Before Installing TWRP
Before proceeding with TWRP installation, taking the following precautions is crucial to prevent potential issues and ensure a smooth process.
Backup Your Data
Installing TWRP and making modifications to your phone’s software can sometimes lead to data loss. Back up all important data, including photos, videos, contacts, and documents, to a safe location like your computer or cloud storage.
Charge Your Device
Ensure your phone has a sufficient battery charge, ideally above 60%, to avoid interruptions during the installation process. A power failure midway could potentially brick your device.
Verify Device Compatibility
Double-check that the TWRP image you download is specifically designed for your phone’s exact model. Installing an incorrect image can lead to serious problems or even brick your device.
Familiarize Yourself with ADB and Fastboot
Gain a basic understanding of ADB and Fastboot commands and how they work. This will help you troubleshoot any issues that may arise during the installation process.
Unlock Your Bootloader (If Necessary)
Many devices require an unlocked bootloader before installing TWRP. Check your device manufacturer’s instructions for unlocking your bootloader. Be aware that this process usually wipes your device’s data, reinforcing the need for backups.
Step-by-Step Guide to Unlocking Your Phone’s Bootloader
Unlocking your bootloader is usually the first step towards customizing your Android device. Be aware that this process will typically wipe your data, so back up everything important. The exact steps vary depending on your phone’s manufacturer, but the general process is similar.
1. Enable Developer Options and OEM Unlocking:
- Go to your phone’s Settings menu.
- Locate “About Phone” and tap on “Build Number” seven times. This will enable Developer Options.
- Return to the main Settings menu and enter “Developer Options.”
- Find and enable “OEM Unlocking.”
- Also, enable “USB Debugging” in Developer Options for connecting to your computer.
2. Connect Your Phone to Your Computer:
Use a USB cable to connect your phone to your computer. Ensure the connection mode is set to “File Transfer” or “MTP.”
3. Use the Manufacturer’s Unlocking Tool or Fastboot Commands:
Some manufacturers provide specific tools for unlocking the bootloader. If your manufacturer doesn’t have a tool, you’ll likely use Fastboot commands. This involves using the command prompt or terminal on your computer. A typical command is fastboot flashing unlock (or fastboot oem unlock for older devices), but always consult your device’s specific instructions. Confirm the unlock on your phone when prompted.
Downloading the Correct TWRP Image for Your Device
Downloading the correct TWRP image is crucial for a successful installation. Using the wrong image can brick your device, so double-check compatibility before proceeding. TWRP images are device-specific, meaning each phone model has its own tailored version.
The primary source for downloading TWRP images is the official TWRP website. However, some device manufacturers may not be officially supported. In these cases, you might find the correct image on reputable forums like XDA Developers. Always prioritize downloads from trusted sources to avoid corrupted or malicious files.
When searching, make sure to use the precise model number of your phone. Even small variations in model numbers can signify significant hardware differences. This information is usually found in your phone’s settings, under “About Phone.” Once you’ve located the correct file, download it to your computer, preferably in a location you can easily access later, such as your Downloads folder.
Installing TWRP Using ADB and Fastboot
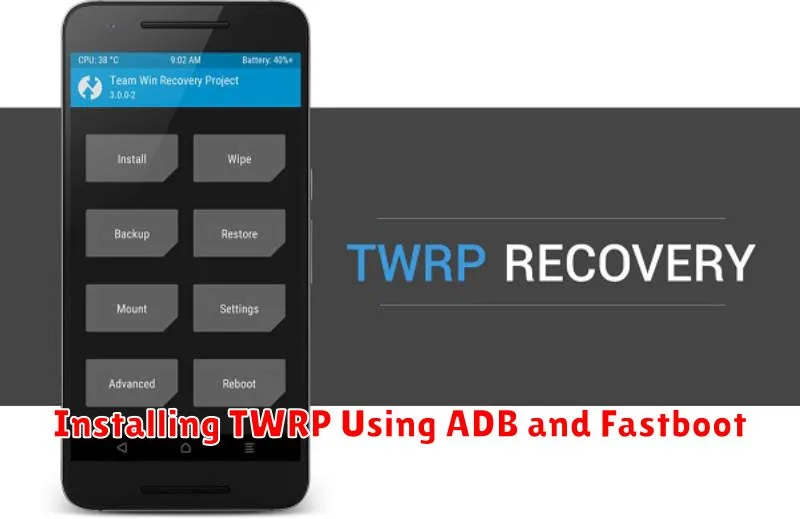
With your bootloader unlocked and the correct TWRP image downloaded, you’re ready to install TWRP. This process utilizes ADB (Android Debug Bridge) and Fastboot, command-line tools that allow communication with your device.
Ensure your device is connected to your computer via USB cable and USB debugging is enabled. Navigate to the platform-tools directory within your ADB installation. Open a command prompt or terminal window in this directory.
Put your device into Fastboot mode. The method varies between devices, but commonly involves holding a combination of power and volume buttons while powering on. Once in Fastboot mode, enter the following command, replacing “twrp.img” with the actual name of your TWRP image file:
fastboot flash recovery twrp.img
After the process completes (which should only take a few seconds), it’s crucial to immediately boot into TWRP recovery. This prevents your stock recovery from overwriting the newly installed TWRP. Typically, this can be achieved through a specific button combination while powering on, or by issuing the command fastboot boot twrp.img
Verifying TWRP Installation and Basic Navigation
After attempting a TWRP installation, it’s crucial to verify its success before proceeding with any modifications. Incorrect installation can lead to complications. To confirm, reboot your device into recovery mode. The method varies by device but typically involves a combination of button presses while powering on. If TWRP’s main menu appears, the installation was successful.
Navigating TWRP primarily relies on the touchscreen. The main menu presents various options, including Install, Wipe, Backup, Restore, and more. Tap the desired option to access its functionality.
Important Note: Familiarize yourself with the basic functions before using TWRP. Incorrect usage can potentially damage your device.
Basic Navigation Summary:
- Reboot to Recovery: Specific button combination during device startup (consult your device’s documentation).
- Touchscreen: Primary method of interaction within TWRP.
- Main Menu Options: Access different functions by tapping the corresponding option.
Backing Up Your Existing ROM Before Making Changes
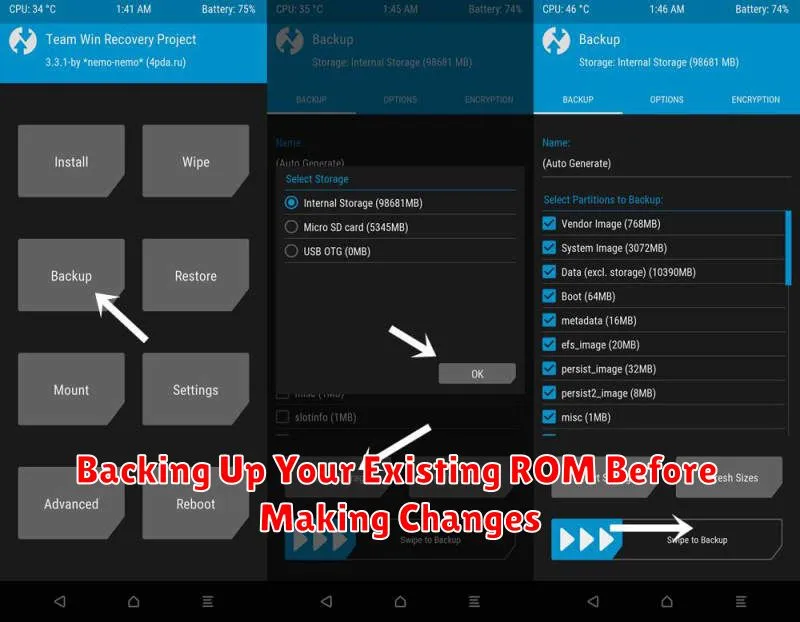
Before making any modifications to your phone’s software using TWRP, creating a backup of your existing ROM is crucial. This backup serves as a safety net, allowing you to restore your phone to its previous state if anything goes wrong during the modification process.
Within TWRP’s main menu, select the “Backup” option. You’ll be presented with a list of partitions to back up. It’s generally recommended to select all partitions. Choose your desired storage location for the backup, typically the internal storage or an external SD card if available.
Important: Ensure you have enough free space in your chosen location to accommodate the backup file, which can be quite large. The backup process might take a few minutes depending on the size of your ROM and the speed of your storage.
Once the backup is complete, you’ll have a restorable image of your phone’s software. This provides a critical safeguard, enabling you to revert to a working state if any issues arise during subsequent modifications.
Common Errors During TWRP Installation and How to Fix Them
Installing TWRP can sometimes encounter issues. This section covers some frequent problems and their solutions. Always ensure your device is compatible and you’ve followed the correct instructions for your specific model.
“No Command” Error
The “No Command” error usually appears after initially flashing TWRP. This often means TWRP flashed correctly, but the system hasn’t properly booted into it. Try manually booting into recovery mode by holding the correct key combination for your device (often power and volume down). If this fails, reflash TWRP.
Stuck in Bootloop
If your device continuously restarts after installing TWRP, it might be a bootloop. Ensure you’ve installed the correct TWRP version for your specific device model. Try clearing the cache and dalvik cache from the recovery menu. If the issue persists, reflash the original stock recovery.
Driver Issues (Windows)
If your computer doesn’t recognize your phone during the installation process, ensure you have the correct USB drivers installed for your device. Try different USB ports and cables as well.
Exploring Advanced Features of TWRP Recovery
Beyond basic backup and restore functionalities, TWRP offers a range of advanced features for experienced users. File management allows you to browse and manipulate files directly on your device’s storage. This can be useful for manually installing updates or removing unwanted files.
Partitioning tools within TWRP allow for resizing and formatting partitions. This advanced feature should be used with extreme caution, as improper usage can lead to data loss. Thoroughly research and understand the implications before modifying partitions.
TWRP also supports terminal emulation. This allows you to execute commands directly on your device, providing a powerful tool for troubleshooting and advanced modifications. Familiarity with command-line interfaces is recommended.
Flashing custom kernels and other modifications is another key capability. Ensure compatibility with your device and ROM before flashing anything, as this can lead to instability or bootloops.