Screen recording on your Android device is an incredibly useful tool for various purposes, from creating tutorials and presentations to capturing gameplay and troubleshooting technical issues. Whether you’re a seasoned content creator or just beginning to explore the capabilities of your Android phone, mastering screen recording can unlock a world of possibilities. This article serves as a comprehensive guide to help you understand and leverage the full potential of Android screen recording, covering everything from basic setup and essential tips to advanced tricks for capturing high-quality footage.
From navigating built-in screen recorders to exploring third-party apps with enhanced features, we’ll delve into the nuances of screen recording on Android. Learn how to customize settings, manage audio input, and edit your recordings for a polished final product. Discover how to effectively use screen recording for business, education, entertainment, and personal use. With these tips and tricks, you’ll be well on your way to mastering screen recording on your Android device and producing engaging and informative content.
Built-in Screen Recording Features
Many modern Android devices come equipped with native screen recording functionality, eliminating the need for third-party apps. Accessing this feature is generally straightforward, though the exact steps may vary slightly depending on your device’s manufacturer and Android version.
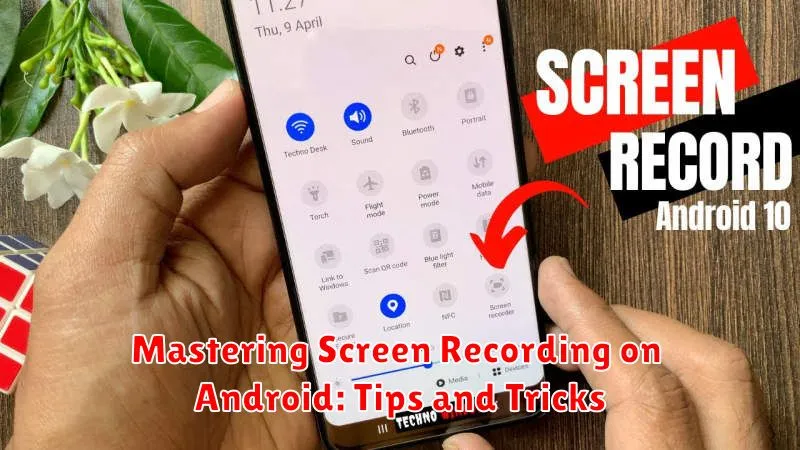
Typically, you can find the screen recorder in your Quick Settings panel. Swipe down from the top of your screen to access it. Look for a screen record icon (often depicted as a small circle with a dot inside). If it’s not immediately visible, you may need to expand the Quick Settings drawer or customize the available tiles.
Once you’ve located the screen recorder icon, tap it to begin recording. You may be presented with options to configure the recording, such as resolution, audio source, and whether or not to show touches on the screen. After configuring your preferences, tap the start button. A countdown will typically appear before the recording begins.
To stop recording, swipe down from the top of the screen and tap the screen recorder notification. The recording will be saved to your device’s gallery, usually in a dedicated “Screen recordings” or similar folder. Be aware that some apps may block screen recording for security reasons.
Using Third-Party Screen Recording Apps
While many Android devices offer native screen recording functionality, third-party apps often provide advanced features and greater flexibility. These apps can be particularly useful for older devices lacking built-in recording or for users seeking specific functionalities.
When choosing a third-party screen recorder, consider factors such as video resolution, frame rate, recording duration limits, and the presence of editing tools. Some popular choices offer features like facecam recording, internal audio capture (on supported devices), and customizable overlays.
Installing a third-party recorder is typically straightforward. Simply search the Google Play Store for “screen recorder,” select a reputable app with positive reviews, and follow the on-screen installation instructions. Once installed, launch the app and configure your desired settings before starting a recording.
Permissions: Be mindful of the permissions requested by third-party apps. Ensure the app only requests necessary permissions related to screen recording and avoid apps that request excessive access to your device data.
Customizing Your Screen Recording Settings

Most Android devices and screen recording apps offer various customization options to tailor your recordings to your specific needs. Understanding these settings allows you to create high-quality recordings optimized for sharing and viewing.
Video Quality
Adjusting the video resolution (e.g., 720p, 1080p) and bit rate directly impacts the file size and visual clarity of your recordings. Higher resolutions and bit rates result in larger files but offer better image quality. Choose settings appropriate for your storage capacity and intended use.
Frame Rate (fps)
Frame rate, measured in frames per second (fps), influences the smoothness of your recordings. A higher frame rate (e.g., 60fps) results in smoother video, especially beneficial for recording fast-paced action, but also increases file size. Standard recordings typically use 30fps.
Audio Source
Select your preferred audio source for the recording. Options may include internal audio (if supported by your device), microphone audio, or both. Internal audio captures sounds from within your device, while the microphone records external sounds.
Recording Internal Audio (for Supported Devices)
Capturing internal audio alongside your screen recording significantly enhances the quality, especially for tutorials, gameplay recordings, or music demos. Unfortunately, this feature isn’t universally available on all Android devices due to hardware and software limitations.
Check Device Compatibility: Some manufacturers include native internal audio recording within their screen recording functionality. Consult your device’s user manual or online resources to confirm if this feature is supported. If not natively supported, third-party apps might offer a workaround, although results may vary.
Enabling Internal Audio Recording: If your device supports it, the option to record internal audio is typically found within the screen recorder’s settings or quick toggles. Look for options labeled “Internal Audio,” “System Sounds,” or similar. Be aware that recording copyrighted audio without permission is illegal.
Alternative Methods (Root Required): For devices without native support, rooting your device may allow the use of specific apps or modules capable of capturing internal audio. However, rooting voids your warranty and carries inherent risks. Proceed with caution and research the process thoroughly.
Troubleshooting Common Screen Recording Problems

Occasionally, you might encounter issues while screen recording. Here are some common problems and their solutions:
No Recording Option
If you can’t find the screen recording option, your device might not support the built-in feature. Check your device’s user manual or contact the manufacturer to confirm. Installing a third-party screen recorder app could provide a solution.
Recording Stops Unexpectedly
Storage space: Ensure you have sufficient free space on your device. Large recordings require considerable storage. Background apps: Close unnecessary background apps to free up system resources. Overheating: If your device overheats, it might stop recording to protect itself. Let it cool down before trying again.
No Audio Recorded
Some devices or apps don’t support internal audio recording. Check your settings: Ensure that the audio source is correctly configured within the screen recording options. Microphone permissions: Verify the app has permission to access your device’s microphone if you’re trying to record external audio.
Poor Recording Quality
Adjust the resolution and frame rate settings within the screen recording app. Lower settings might improve performance on less powerful devices. Closing background apps can also help with performance.
Tips for Creating High-Quality Screen Recordings
Creating professional-looking screen recordings involves a few key steps. Plan your content beforehand. Knowing what you want to capture ensures a smooth and concise recording, avoiding unnecessary edits later.
Minimize distractions before you begin. Close unnecessary apps and silence notifications to prevent interruptions during the recording process. This will create a cleaner, more focused final product.
Choose the right resolution and frame rate. Higher resolutions (e.g., 1080p) produce sharper videos, while a consistent frame rate (e.g., 30fps or 60fps) ensures smooth playback. Check your device’s recording settings for available options.
Pay attention to your audio quality. If your recording incorporates voiceovers, consider using a microphone to enhance clarity. If capturing in-game sounds, ensure they are balanced and not overpowering.
Finally, a clean screen is essential. Ensure there aren’t any unwanted visual elements or notifications on display before starting your recording.
Editing Your Screen Recordings
After capturing your screen recording, you might want to polish it before sharing. Many Android video editing apps offer basic functionalities, allowing you to trim the beginning and end of your videos. This is particularly helpful for removing unnecessary pauses or fumbles before and after the core content.
Trimming is arguably the most common edit. Most mobile video editors offer a simple interface where you drag sliders to select the desired start and end points of your recording.
Beyond simple trimming, some apps offer more advanced features. Adding text overlays can be useful for highlighting key information or creating tutorials. Transitions can help create a smoother flow between different sections of your recording if you’ve pieced multiple clips together. Some apps even allow you to add music or voiceovers, further enhancing your content.
Choose an editing app that aligns with your needs and technical comfort level. Start with simple edits like trimming before exploring more complex features.
Sharing Your Screen Recordings
Once you’ve perfected your screen recording, sharing it is a straightforward process. Android offers various built-in sharing options, allowing you to quickly distribute your content.
Directly from the screen recorder app, you can typically find a share icon or option. Tapping this will present you with a list of apps through which you can share your recording. Popular choices include messaging applications such as WhatsApp and Telegram, social media platforms like Facebook and Instagram, or cloud storage services such as Google Drive and Dropbox.
Selecting the desired platform will automatically initiate the sharing process. The recording will be uploaded or attached, depending on the chosen platform, and you can add a caption or message as needed before finally sending or posting it.
Alternatively, you can locate your saved screen recordings within your device’s file manager. From there, you can similarly select the recording and utilize the system-wide share functionality to distribute your video.

