
Do you want to truly master your Android device? Unlocking the bootloader is the first step towards taking full control and exploring the vast potential of your Android phone or tablet. This comprehensive guide will delve into the process of bootloader unlocking, explaining what it is, why you might want to do it, and the potential risks involved. From custom ROMs to root access and beyond, understanding bootloader unlocking is essential for anyone looking to push the boundaries of their Android experience.
This guide will provide a clear and concise breakdown of the bootloader unlocking process for a variety of Android devices. We’ll cover the necessary precautions, the steps involved, and the potential benefits and drawbacks. Whether you’re a seasoned Android enthusiast or just starting your journey into the world of device customization, this guide will equip you with the knowledge you need to confidently unlock your bootloader and unleash your Android device’s true power. Learn how to install custom recoveries, gain root access, and truly customize your Android experience like never before.
Understanding the Bootloader and its Purpose
The bootloader is a critical piece of software that’s the first thing to run when you power on your Android device. Think of it as a gatekeeper, controlling the initial startup process.
Its primary purpose is to load the operating system kernel and the Android system. Without a functioning bootloader, your device wouldn’t know how to start up.
Typically, the bootloader is locked by default by the manufacturer. This is a security measure to ensure your device boots only the authorized operating system and prevents unauthorized modifications. A locked bootloader helps maintain the integrity and security of your device’s software.
Unlocking the bootloader removes these restrictions, allowing you to install custom ROMs, kernels, and other modifications.
Risks and Benefits of Unlocking the Bootloader
Unlocking your bootloader offers exciting possibilities but comes with inherent risks. Understanding these is crucial before proceeding.
Benefits
Increased Customization: Unlocking allows installing custom ROMs, kernels, and other modifications, offering greater control over your device’s appearance and functionality. Improved Performance: Custom kernels can optimize performance and battery life. Full Data Control: Gain the ability to create complete backups and restore your device to a specific state.
Risks
Voided Warranty: Unlocking often voids your device’s warranty. Security Risks: Unlocking can make your device more vulnerable to security threats if not handled carefully. Data Loss: The unlocking process usually requires a factory reset, resulting in complete data loss. Bricking: While rare, errors during the unlocking process can potentially “brick” your device, rendering it unusable.
Essential Preparations Before Unlocking
Before proceeding with unlocking your bootloader, taking the necessary precautions is crucial to avoid potential problems. These steps will help ensure a smoother unlocking process and minimize the risk of data loss.
Back Up Your Data
Unlocking the bootloader will erase all data on your device. This includes photos, videos, apps, and settings. Create a complete backup of your device to a computer or cloud service. This will allow you to restore your data after the unlocking process is complete.
Charge Your Device
Ensure your Android device has a sufficient charge, preferably a full battery. The unlocking process can take some time, and a power interruption could lead to serious issues.
Install Necessary Drivers
You might need specific USB drivers for your Android device to interact correctly with your computer. Consult your device manufacturer’s website to download and install the appropriate USB drivers for your operating system.
Enable USB Debugging and OEM Unlocking
These options are typically found in the Developer Options menu within your Android settings. Enabling these options allows your device to communicate with your computer for the unlocking process. Refer to your device’s documentation for specific instructions on enabling Developer Options if they are not already visible.
Step-by-Step Guide to Unlocking Your Android Bootloader
The process for unlocking your bootloader varies depending on your device’s manufacturer. However, the general steps remain similar. It is crucial to consult your device manufacturer’s specific instructions and forum for the most accurate and up-to-date guide.
General Steps (Consult your manufacturer’s instructions for device-specific procedures):
- Enable Developer Options and USB Debugging: This usually involves tapping the build number in your device’s settings multiple times.
- Install Necessary Drivers: Ensure your computer has the correct USB drivers installed for your Android device.
- Connect Your Device to Your Computer: Use a USB cable to connect your device to your computer.
- Boot into Fastboot Mode: This is usually done by holding down a specific combination of buttons while powering on the device. Instructions vary by manufacturer.
- Unlock the Bootloader: On your computer, open a command prompt or terminal and navigate to the platform-tools directory within your Android SDK installation. Execute the appropriate fastboot command to unlock the bootloader. This often involves a command like
fastboot oem unlockorfastboot flashing unlock. - Confirm Unlock on Your Device: Your device will typically display a confirmation screen. Use the volume buttons to navigate and the power button to select.
- Reboot Your Device: Your device will now reboot and the bootloader will be unlocked.
Important Considerations:
- Unlocking your bootloader will usually erase all data on your device. Back up your data beforehand.
- This process may void your warranty. Proceed with caution.
Common Issues and Troubleshooting During the Unlocking Process
Unlocking your bootloader can sometimes encounter hiccups. This section addresses common issues and provides troubleshooting steps.
Device Not Recognized by Computer
If your computer doesn’t recognize your device in fastboot mode, ensure you have the correct USB drivers installed. Try a different USB cable and port. Verify that USB debugging and OEM unlocking are enabled in developer options.
“Waiting for Device” Error
This usually indicates a driver issue or a problem with the USB connection. Reconnect your device, try a different USB port, and ensure the cable is functioning correctly. Double-check that your device is in fastboot mode.
Command Errors (e.g., “FAILED”)
Pay close attention to the specific error message displayed. It often provides clues about the problem. Ensure the unlock command is correct for your device model. Verify that your device is officially supported for bootloader unlocking by the manufacturer.
Reverting to a Locked Bootloader: Step-by-Step Guide
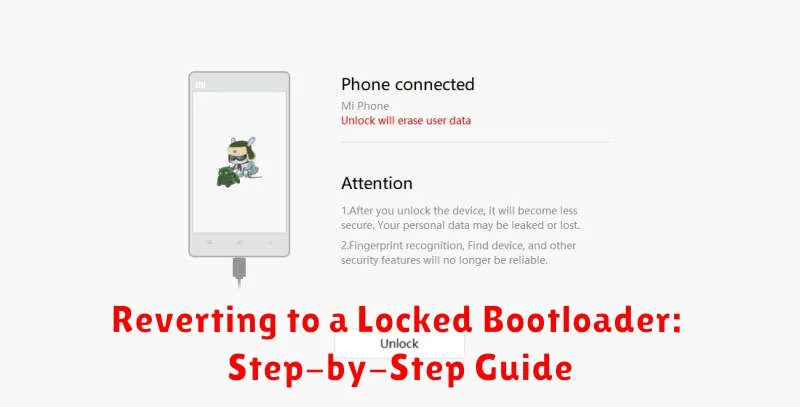
Reverting to a locked bootloader is often possible, though it varies by device manufacturer and model. This process generally erases all data on your device, so ensure you have a backup.
Step 1: Install the necessary tools. This typically involves the Android Debug Bridge (ADB) and your device’s specific USB drivers on your computer. Consult your manufacturer’s website for specific instructions and downloads.
Step 2: Enable USB debugging on your Android device. This is usually found within the Developer Options menu.
Step 3: Connect your device to your computer. Ensure it’s recognized properly.
Step 4: Open a command prompt or terminal on your computer. Navigate to the directory containing your ADB installation.
Step 5: Issue the relock command. The specific command varies by manufacturer, but often resembles fastboot oem lock or fastboot flashing lock. Double-check the correct command for your specific device to avoid potential issues.
Step 6: Confirm the lock on your device. Your device will prompt you to confirm. Once completed, your bootloader will be relocked and your device will factory reset.
Exploring Post-Unlock Options: Custom ROMs and Recoveries
With an unlocked bootloader, you gain access to a world of customization options, primarily through custom ROMs and custom recoveries. These tools allow you to fundamentally alter the software running on your device.
Custom ROMs
A custom ROM is a completely alternative operating system built for your device. These ROMs often offer enhanced features, performance improvements, and a cleaner Android experience, free from manufacturer or carrier bloatware. Popular examples include LineageOS and Pixel Experience.
Custom Recoveries
Custom recoveries, such as TWRP (Team Win Recovery Project), replace the stock recovery software. They provide advanced functionalities like installing custom ROMs, creating and restoring backups (NANDroid backups), and clearing caches. This control is crucial for managing and modifying your device’s software post-unlock.